
Rental Properties Inspections: A Landlord's Essential Guide
- Sarah Porter

- Nov 15, 2025
- 15 min read
As a landlord, one of the most powerful tools in your arsenal is the routine property inspection. It’s far more than just a quick walkthrough; it's the foundation of smart, proactive property management. Skipping them is one of the biggest (and most common) mistakes I see landlords make.
Regular inspections are your first line of defense, allowing you to protect your asset, ensure legal compliance, and maintain a safe, habitable home for your tenants.
Why Smart Landlords Never Skip Inspections
It’s easy to view inspections as just another task on a long to-do list, but that’s a shortsighted and potentially very expensive mistake. Think of them as your primary tool for managing your investment. These checks are your best defense against the slow, silent creep of deferred maintenance that can eat away at your property's value.
A slow drip under the sink or a small patch of mildew in the bathroom corner might not seem like a big deal. But left ignored, these small problems can balloon into major water damage, structural issues, and repair bills that run into the thousands. Regular rental properties inspections give you the power to spot and fix these things early, protecting both your property and your profit margins.
Protecting Your Investment Through Proactive Maintenance
Beyond just catching physical problems, inspections are a fantastic way to build a professional, positive relationship with your tenants. When you take the time to check on the property's condition, you’re sending a powerful message: you're an engaged, responsible landlord who genuinely cares about their home.
This simple act of showing up builds trust and often makes tenants more comfortable reporting issues to you as soon as they arise.
A well-documented inspection really does three critical things at once:
Asset Protection: It creates a consistent, historical record of your property's condition, helping you track normal wear and tear versus actual damage.
Tenant Accountability: It's your chance to verify that tenants are sticking to the lease terms—no unauthorized pets, no smoking, and no unapproved occupants.
Relationship Building: It opens a direct line of communication, giving tenants a formal opportunity to voice any concerns they might have.
Legal Compliance and Risk Mitigation
Inspections aren't just good business sense; they're often a legal and insurance requirement. One of the biggest reasons to be consistent is to stay on the right side of the law. For example, it's absolutely crucial to understand gas safety certificate requirements for landlords. Neglecting your duty to provide a safe property can open you up to serious legal trouble.
With the global real estate rental market projected to hit $2904.2 billion, we're seeing much stricter regulations and higher expectations from tenants. This growth underscores the need for landlords to be diligent about meeting safety and quality standards through standardized inspections.
Detailed inspection reports with time-stamped photos create an undeniable paper trail. This documentation is your strongest evidence in a security deposit dispute and can be crucial for validating an insurance claim in the event of property damage.
To really get a handle on this, it helps to understand that not all inspections are the same. Each one has a specific job to do.
The Four Core Types of Rental Inspections
Here’s a quick breakdown of the main types of inspections you'll be conducting throughout a tenancy. Each serves a unique purpose at a specific time.
Inspection Type | Primary Purpose | When to Conduct |
|---|---|---|
Move-In Inspection | To document the property's exact condition before the tenant gets the keys. Establishes a baseline. | Before the tenant moves in, ideally with them present. |
Routine Inspection | To check for maintenance needs, lease violations, and general upkeep. | Periodically during the tenancy (e.g., quarterly or semi-annually). |
Drive-By Inspection | To check the property's exterior condition without entering. Looks for obvious issues or violations. | Occasionally, as needed, without disturbing the tenant. |
Move-Out Inspection | To compare the property's final condition against the move-in report to assess for damages. | After the tenant has fully vacated and removed all belongings. |
Understanding when and why to perform each of these inspections will make you a much more effective and protected landlord.
Setting the Stage for a Successful Inspection
I’ve learned over the years that a smooth inspection is 90% preparation. Before you even think about putting a date on the calendar, you need to lay the right groundwork. This isn’t just about being organized; it’s about making sure the whole process is legal, respectful, and actually gets the job done.
Skipping this prep work is a classic mistake. It almost always leads to friction with your tenants or, worse, you miss a critical issue that costs you down the line.
The absolute first thing you must do is provide proper legal notice. Your tenants have a right to "quiet enjoyment" of their home, which means you can’t just pop in whenever you feel like it. While the specific rules change from place to place, most areas require at least 24 to 48 hours of written notice for any non-emergency entry.
This isn’t just being polite—it’s the law. Always, and I mean always, double-check your state and local landlord-tenant laws. You need to know the exact notice period and how you're allowed to deliver it. Can you email it? Does it need to be certified mail? Or do you have to physically post it on their door? Get it right.
Crafting a Custom Inspection Checklist
A generic checklist you downloaded from the internet just won't cut it. Every property has its own quirks, and your inspection plan needs to reflect that. A truly useful checklist is tailored to the specific features, age, and maintenance history of your rental.
Think beyond just looking for leaky faucets. What makes your property unique?
Does it have a finicky HVAC system that needs its filter checked religiously?
Is there a wooden deck or fence you need to inspect for rot or wobbly posts?
Are you dealing with older appliances that you know are prone to issues?
Did you outline specific landscaping duties in the lease that you need to verify?
Your goal here is to create a personal roadmap that forces you to look at everything, from the crawl space to the chimney cap. A great place to start is by building off the detailed report you created during the initial walkthrough. In fact, our guide on creating a move-in property condition checklist has some great pointers that apply perfectly here.
When you customize your list, you build a repeatable system. It’s the best way to make sure nothing important gets overlooked.
Scheduling and Communicating with Tenants
How you approach your tenants about an inspection is just as important as the inspection itself. If you come across as demanding or adversarial, you'll immediately put them on the defensive, and the whole visit will be tense and unproductive. You have to frame it as a positive, collaborative event.
Here’s a pro tip: Stop calling it an "inspection." That word sounds intimidating, like you're looking for something to pin on them. Instead, try calling it a "maintenance visit" or a "property wellness check." This small language shift makes a huge difference. It frames the visit as a way to ensure the home is in great shape for them.
When it comes time to schedule, offer a few different time slots and ask what works for their schedule. A little flexibility shows you respect their time and makes them feel included in the process.
For example, a quick, friendly email can work wonders:
"Hi [Tenant Name], I'd like to schedule our semi-annual maintenance visit for next week. I just want to check the smoke detectors, look for any small plumbing leaks, and make sure everything is in good working order for you. Would Tuesday at 10 AM or Wednesday at 2 PM be better? Let me know what you prefer!"
This simple, cooperative approach sets the stage for a much smoother visit for everyone.
How to Conduct a Thorough and Respectful Inspection
With all your prep work done, it's time for the main event: the on-site walkthrough. This is where your careful planning really shines, but it’s also a delicate dance. You need to be incredibly thorough without making your tenant feel like they're living under a microscope.
Perfecting Your On-Site Process
A systematic approach is your best friend here. I’ve always found it best to work from the outside in. Start with the property's exterior—check the roof from the ground for any obvious missing shingles, inspect the siding for damage, and take a good look at the walkways, fences, and landscaping. This gives you a solid, big-picture assessment before you even set foot inside.
Once you’re indoors, be methodical. Move from room to room in the same order every single time. Consistency is key to not missing anything. For example, I always start at the front door and work my way clockwise through the property. This turns the inspection into a repeatable, reliable process rather than a random hunt for problems.
This infographic breaks down the crucial steps to get right before you even arrive.
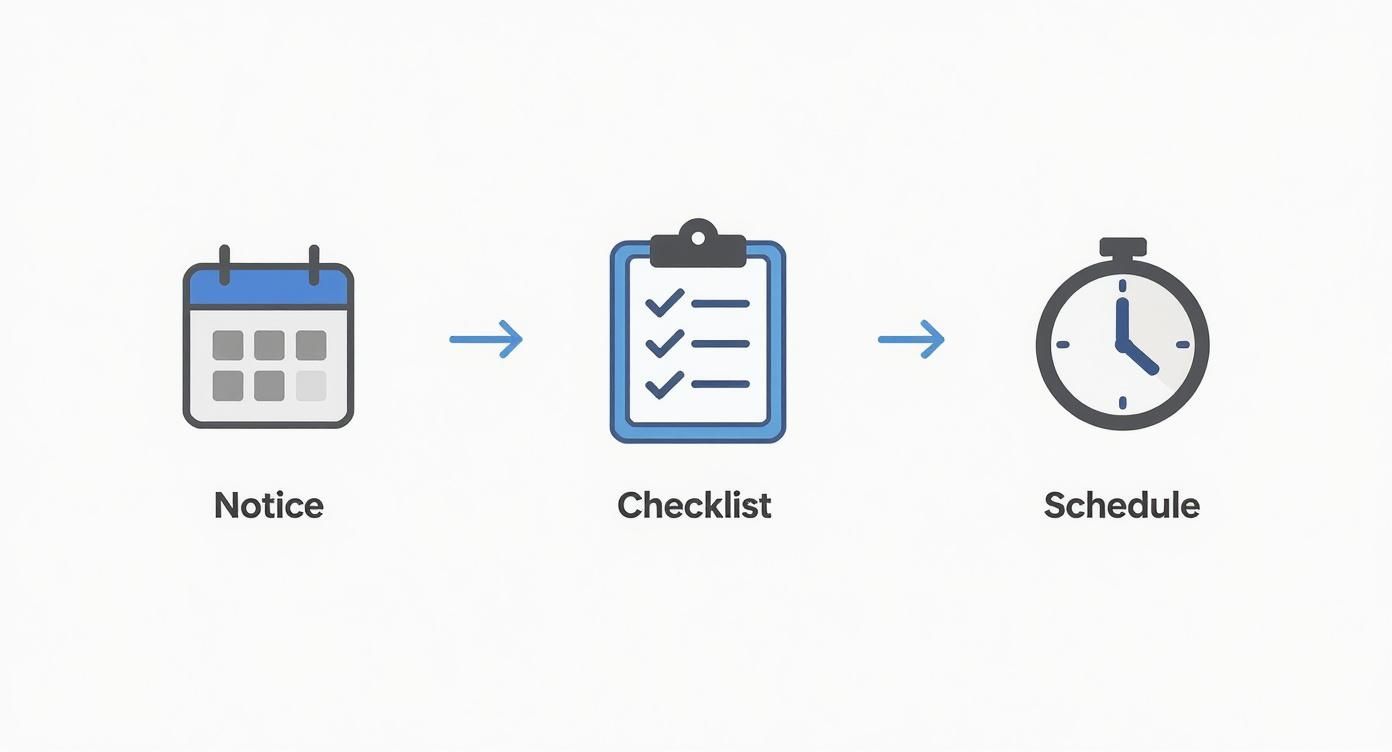
Nailing this flow—giving proper notice, having your checklist ready, and setting a firm time—lays the groundwork for a visit that's both smooth and legally sound.
Mastering On-Site Documentation
During rental properties inspections, your smartphone is easily your most valuable tool. There's no substitute for clear, well-lit photos. They create an undeniable, time-stamped record of the property's condition that can save you from a world of hurt down the line, especially when it comes to security deposit disputes.
Don’t just snap one wide shot of a room and call it a day. Get granular. Take close-ups of specific issues—that slow drip under the bathroom sink, the small crack in a window pane, or a burn mark on the kitchen counter. Just make sure your photos have context. A close-up of a scuff mark is useless if you can't tell which wall it's on.
Your written notes need to be just as specific. Instead of "kitchen floor damaged," write something like, "Three-inch scratch on vinyl flooring to the left of the dishwasher." Vague notes are easy to argue with; specific, factual observations are not. Our guide on your essential property inspection checklist template provides a fantastic framework for keeping these details organized.
A great checklist is the backbone of any good inspection. Here’s a quick breakdown of what to look for in key areas of the property.
Essential Inspection Checklist by Area
Area | Key Items to Check | Common Issues to Note |
|---|---|---|
Kitchen | Appliances (all functions), sink/faucet (leaks, pressure), countertops, cabinets | Scratches, burn marks, slow drains, non-working oven light |
Bathroom | Toilet (flushing, leaks), shower/tub (caulking, drainage), sink, exhaust fan | Mold/mildew buildup, running toilet, low water pressure, cracked tiles |
Bedrooms | Walls, floors, windows (locks, screens), closet doors, light fixtures | Scuff marks on walls, carpet stains, broken window latches |
Living Areas | Flooring (carpet, wood), walls, outlets, windows, doors | Nail holes, damaged blinds, worn-out carpet, inoperable outlets |
Exterior | Siding, roof (from ground), gutters, walkways, fence/gates, landscaping | Clogged gutters, cracked pavement, overgrown yard, peeling paint |
Using a structured list like this ensures you cover all your bases methodically, leaving no stone unturned.
The Art of Respectful Communication
How you talk to your tenant during the inspection is just as critical as what you find. Always maintain a professional and calm demeanor. This isn't the time to comment on their housekeeping or personal belongings—your focus is strictly on the property's condition, safety, and lease compliance.
If the tenant is home, treat it as an opportunity to build a positive relationship. Ask them if they’ve noticed any maintenance issues themselves, like a toilet that runs constantly or a lock that's getting sticky. This small step can transform the inspection from an audit into a collaborative effort to maintain their home.
When you do spot a problem, document it quietly first. Avoid pointing it out with an accusatory tone right then and there. Once you’ve finished the entire walkthrough, you can circle back to discuss your findings constructively. This approach keeps the tenant from getting defensive and keeps the conversation focused on solutions, not blame.
For instance, if you notice evidence of an unauthorized pet, don't confront them on the spot. Make a note, take a photo of the food bowl or pet bed, and plan to address it formally in writing after the inspection.
This professional approach has never been more important. The global home inspection services market is on track to blow past $10 billion, largely because of increasing regulations and higher tenant expectations. Here in the U.S., the property management industry is projected to hit $98.88 billion, a number that underscores the growing need for skilled, professional conduct. You can read more about these market trends in home inspection services. This data makes it clear: a documented, respectful process isn’t just a nice-to-have anymore—it’s an absolute essential for any modern landlord.
Turning Your Inspection Findings into Action
So, you've walked through the unit, taken your photos, and made your notes. What now? The inspection itself is only half the battle. If you just file away that checklist, you're missing the entire point. The real value comes from what you do next.
Your first move is to translate all those scribbled notes and phone pictures into a straightforward, professional report. This doesn't need to be some fancy legal document. Honestly, a simple summary that you can share with your tenant is usually the most effective approach for keeping everything clear and documented.
When you write this report, aim for balance. Don't just list the problems. Be sure to point out what's going well. Thanking a tenant for how clean they keep the kitchen or for their great-looking yard can go a long way. After the praise, you can clearly outline the items that do need attention. This makes the whole process feel less like an accusation and more like a partnership in keeping the property in good shape.
Prioritizing Your Action Items
Let's be realistic: not every issue you find carries the same weight. A dripping faucet is a problem, but it’s not the same as a faulty smoke detector. Trying to tackle everything at once is a recipe for getting overwhelmed.
From my experience, the best way to handle this is to sort every single item into one of three buckets.
Urgent Safety Hazards: These are the big ones—the absolute, non-negotiable, drop-everything-and-fix-it-now issues. We're talking about things like a gas smell, broken locks, major water leaks, or non-functional smoke detectors. These are immediate risks to your tenant and your liability, so they automatically jump to the very top of the list.
Landlord Responsibilities: This category is for all the routine maintenance and repair jobs that are on your plate as the owner. Think running toilets, appliances on the fritz, or a clogged gutter. These need to be handled in a timely manner as part of your normal responsibilities.
Tenant-Caused Damage or Lease Violations: This last bucket is for anything that goes beyond normal wear and tear. Maybe they painted a room without permission, a window got broken during a party, or you found clear evidence of an unauthorized pet.
Organizing your findings this way takes a messy to-do list and turns it into a clear, actionable game plan. It helps you focus your time and money where they're needed most.
Your follow-up communication really sets the tone for everything that happens after the inspection. A professional, clear email that summarizes the findings, explains the next steps, and gives firm timelines is non-negotiable. It also creates the paper trail you need to document every decision.
Communicating Findings and Setting Timelines
Once you have your priorities sorted, it's time to talk to your tenant.
For the items that are your responsibility, a quick and clear message is all you need. Something like, "Thanks again for your time today. I’ve scheduled a plumber to fix the leaky faucet in the bathroom for this Friday between 10 AM and 12 PM. I'll confirm with you 24 hours beforehand," works perfectly.
Addressing issues caused by the tenant requires a bit more formality. Your communication needs to be firm but fair. It's crucial to reference the specific clause in the lease they've violated and give them a clear deadline to fix the problem.
For example: "During yesterday's inspection, I noted an unauthorized pet in the unit. As per section 8 of your lease agreement, pets are not permitted. Please resolve this situation within 7 days." This approach is direct, professional, and creates a written record that protects you as the landlord.
Using Technology to Simplify Your Inspections
Let’s be honest, the days of soggy clipboards and pens that run out of ink are over. If you’re still doing inspections the old-fashioned way, you’re not just wasting time—you’re leaving yourself exposed. Embracing modern tech can transform your rental properties inspections from a dreaded task into a streamlined, professional process.
Think about this common scenario: a tenant moves out, and you discover a series of deep scratches on the brand-new hardwood floors. Without clear proof, it’s your word against theirs. Now, imagine pulling up a move-in report on your tablet with time-stamped, high-resolution photos of those same floors in pristine condition. That’s the difference-maker in a security deposit dispute, and it’s a power you get by going digital.
Key Features of Modern Inspection Software
Property inspection apps are built by people who understand our biggest headaches. They’re designed to make our lives easier. When you're shopping around, keep an eye out for these essential features:
Customizable Checklists: You can create a master template for all your properties and then tweak it as needed. This ensures you never forget to check the smoke detectors or peek under the sink for leaks.
Offline Access: This is a lifesaver. You can conduct a full inspection in a basement or garage with zero cell service, and the app will automatically sync everything once you’re back online.
Photo and Video Embedding: The ability to attach photos directly to a checklist item is invaluable. Instead of a vague note like "wall scuffed," you have a crystal-clear picture right there in the report.
Digital Signatures: Getting tenants to sign off on move-in and move-out reports directly on your device is a game-changer. It creates an instant, agreed-upon record of the property's condition.
A small investment in a good app pays for itself almost immediately. The time you save on administrative work alone is worth it, not to mention the professional, branded PDF reports you can generate in minutes. It just makes you look better.
This isn't just about making your job easier; it's about keeping up with what tenants and the industry expect. In fact, 60% of property managers have already shifted to digital platforms to create more transparent and defensible reports.
If you're managing several properties, looking into specialized building inspection software is a smart move. These tools are built to handle volume and complexity.
Ultimately, the best part is having a searchable, cloud-based history for every single property. This long-term record is fantastic for tracking wear and tear over multiple tenancies, helping you budget for future repairs, and simply running a smarter business. Adopting these tools is one of the key property management technology trends for 2025 that savvy landlords are already putting into practice.
Got Questions? Let's Talk Through Common Inspection Hurdles
Even the most buttoned-up inspection plan can hit a snag. Real-world situations and legal gray areas are just part of being a landlord. Let's walk through some of the most common questions that pop up, so you can handle them confidently instead of getting caught off guard.
How Often Can I Actually Inspect My Property?
This is a classic balancing act. You need to protect your investment, but your tenant has a right to privacy. While you should always check your local and state laws, a good rule of thumb is to schedule routine inspections once or twice a year. This is separate from the essential move-in and move-out inspections.
Of course, sometimes you need to go in for a specific reason. Maybe there's an emergency like a burst pipe, or you have solid grounds to believe there's a serious lease violation. For any non-emergency entry, the golden rule is simple: provide proper written notice. Most states require 24 to 48 hours, but never assume—always verify your local requirements.
What if a Tenant Says "No" to an Inspection?
Tenants do have a right to "quiet enjoyment" of their home, but that doesn't give them a free pass to block legitimate inspections. If you've given proper legal notice for a valid reason, they can't unreasonably deny you entry.
If this happens, don't get into a heated argument. The first step is to send a calm, professional written reminder. Point to the specific clause in their lease agreement that outlines your right to access the property. If they still refuse, you may need to escalate to a formal "Notice to Comply or Quit." Whatever you do, never enter the property without permission or a court order.
This is where things can get tricky and contentious. Document every single communication. Keep a record of your initial notice, the tenant's refusal, and any follow-up messages. That paper trail is your best friend if you end up in a legal dispute.
Wear and Tear vs. Damage: What's the Difference?
Getting this right is absolutely crucial when it comes to handling the security deposit. It's the difference between a fair deduction and a potential lawsuit.
Normal wear and tear is the natural decline that happens over time from a tenant simply living in a space. Think of things like:
Faded paint from sunlight
Minor scuffs on the walls where a couch was
Carpet that's a bit worn down in the main hallway
Tenant damage, on the other hand, is caused by negligence, abuse, or accidents. This is stuff that goes beyond normal use, like:
A big, fist-sized hole in the drywall
A cracked window pane
Deep gouges in the hardwood floors from dragging heavy furniture
An unapproved, sloppy paint job in a bright color
Your absolute best defense here is your move-in inspection report. The detailed notes and photos you took at the beginning of the tenancy become undeniable proof when you compare them to the property's condition at move-out.
I Found a Lease Violation. Now What?
Seeing an unauthorized pet or smelling smoke in a non-smoking unit can be frustrating. But how you react in that moment is key.
Document It Immediately. Don't rely on memory. Pull out your phone and take clear, time-stamped photos of the evidence. Make detailed notes on your inspection checklist about what you saw, where you saw it, and when.
Send a Formal Notice. Resist the urge to confront the tenant on the spot. Go back to your office and issue a formal written notice that clearly states which clause of the lease has been violated. This is usually a "Cure or Quit" notice, which gives the tenant a set amount of time to fix the problem (e.g., rehome the pet).
Follow Up. If the tenant resolves the issue within the timeframe, great. If not, you can then begin the formal eviction process, following your local landlord-tenant laws to the letter.
At Keshman Property Management, we've navigated these exact situations for two decades, turning headaches into straightforward processes. We make owning rental properties less stressful and more profitable. To see how our transparent, owner-focused services can help you, learn more at https://mypropertymanaged.com.

Comments