
Move In Property Condition Checklist: 8 Key Tips for 2025
- Sarah Porter

- Oct 6, 2025
- 19 min read
Moving into a new rental property is an exciting milestone, but overlooking one critical step can lead to disputes and financial loss when you eventually move out. The move in property condition checklist is your single most important tool for protecting your security deposit and establishing a clear, professional relationship with your landlord from day one. It serves as a foundational document, a baseline record of the property's state before you even unpack your first box.
This comprehensive guide breaks down the inspection process into eight critical areas, providing a detailed, room-by-room roadmap to ensure nothing is missed. By meticulously documenting the property's condition before your tenancy officially begins, you create an indisputable record. This crucial step helps distinguish pre-existing issues from any wear and tear that occurs during your lease term. Think of it not as mere paperwork, but as your primary financial and legal safeguard against unfair deductions from your deposit.
This article will not just list items; it will provide actionable insights for each one. We will explore every inspection point with specific tips, real-world examples of what to look for, and a focus on the details that matter most. From testing every electrical outlet to checking for slow drains and documenting minor scuffs on the wall, this checklist is designed to be thorough. Our goal is to empower both tenants and landlords to start a lease agreement with complete confidence, transparency, and a shared understanding of the property's condition, preventing potential conflicts down the line.
1. Walls, Ceilings, and Floors Inspection
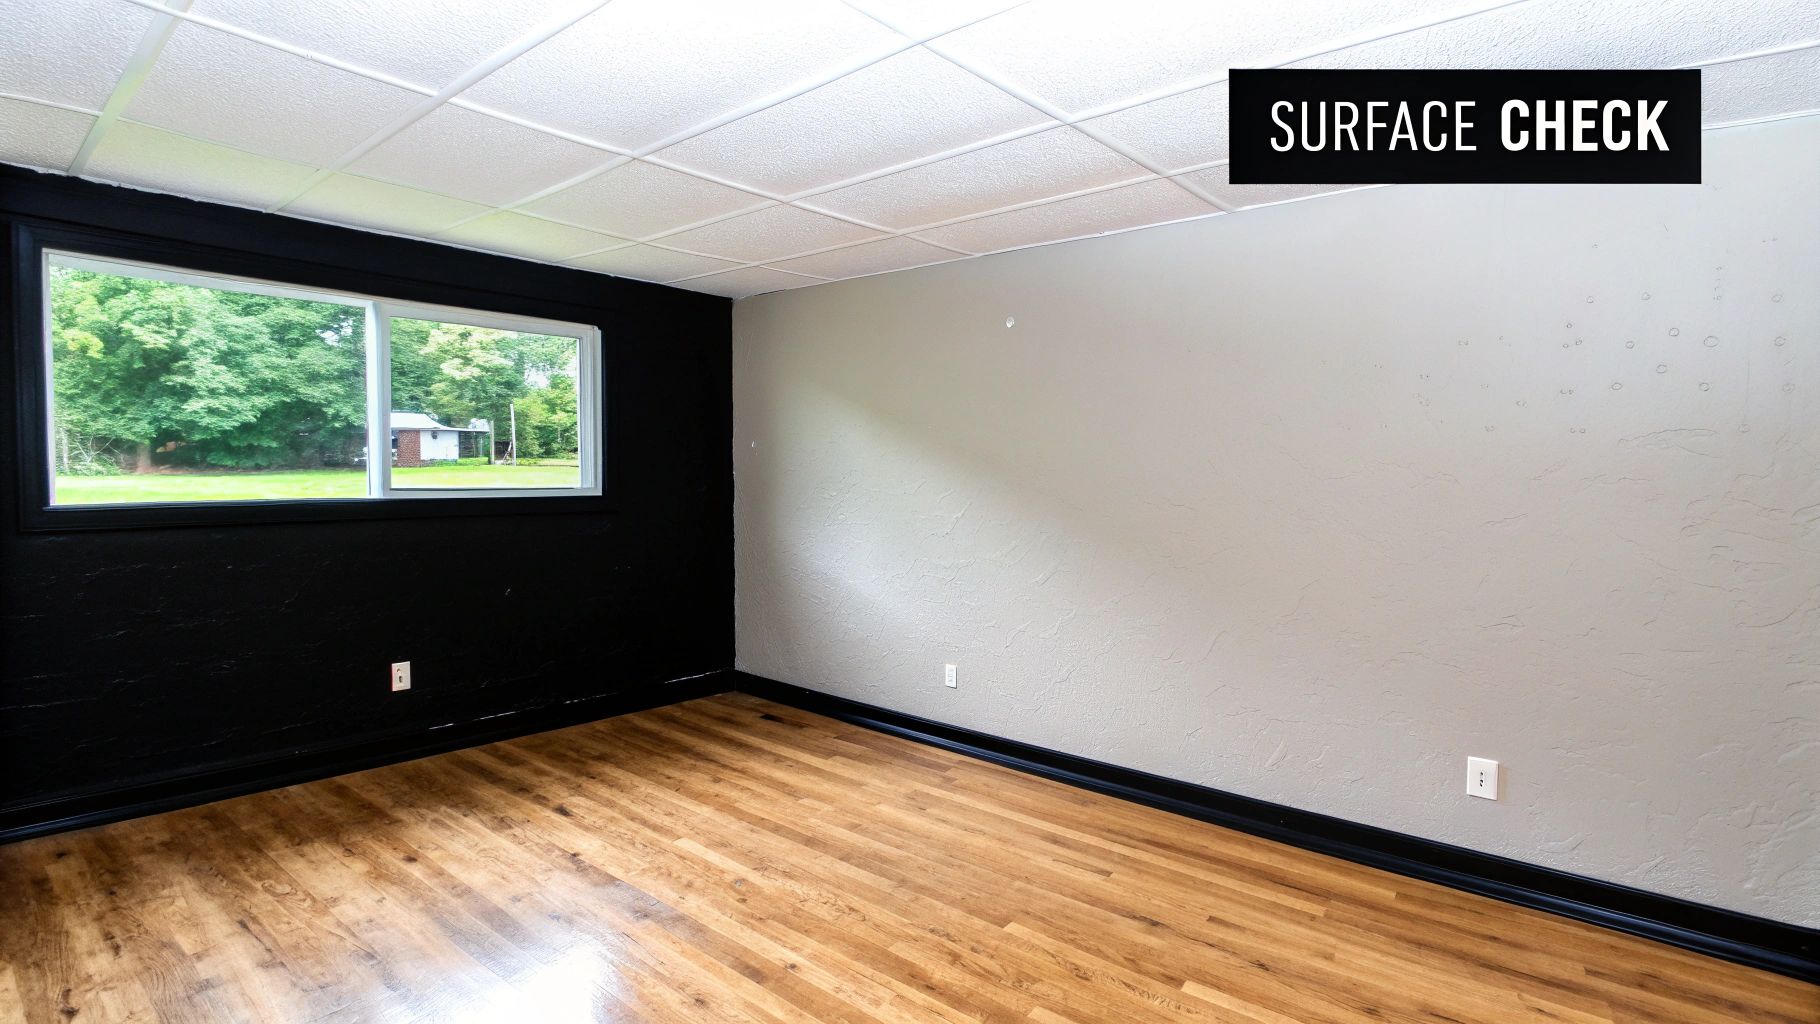
The foundational elements of any room are its surfaces: the walls, ceilings, and floors. A meticulous inspection of these areas is a critical first step in any comprehensive move in property condition checklist. This process involves a detailed examination of every surface in every room to document any pre-existing imperfections, from minor scuffs to significant damage. Properly recording these conditions establishes a clear baseline of the property's state at the start of a tenancy, which is essential for fair and accurate security deposit reconciliation upon move-out.
This systematic approach protects both tenants and landlords. Tenants are shielded from being charged for damage they didn't cause, while landlords maintain precise records, helping to distinguish between normal wear and tear and actual tenant-caused damage. This initial documentation is the single most important reference point for the end-of-lease inspection.
Successful Implementation Examples
Large-Scale Property Management: Industry leaders like Greystar often utilize proprietary digital applications that guide leasing agents and tenants through a room-by-room inspection. The app prompts for photos of each wall and floor, creating a time-stamped visual record that is stored digitally and shared with all parties.
Short-Term Rentals: Experienced Airbnb hosts rely on detailed checklists to quickly assess surface conditions between guests. They maintain a photo library of every wall, ceiling, and floor, allowing them to spot new scratches on hardwood or fresh scuffs on paint immediately.
University Housing: To manage thousands of units, university housing departments keep extensive photo documentation of dorm room conditions. This helps them fairly assess damages at the end of each semester across a high volume of student turnovers.
Actionable Tips for Surface Inspection
To ensure your inspection is thorough and your documentation is irrefutable, follow a structured process. Start at the entrance of each room and move methodically in one direction (e.g., clockwise), examining the ceiling, then the walls, and finally the floor before moving to the next room. For an even more detailed guide to inspections, you can explore this essential checklist for rental home inspections.
Document with Scale: When photographing damage like a hole or a crack, place a common object like a coin or a measuring tape next to it. This provides an immediate sense of scale.
Use Consistent Lighting: Take photos during the day with natural light and again with the lights on. Some stains or discolorations are only visible under specific lighting conditions.
Mark and Highlight: Use small, non-damaging painter's tape to mark blemishes before taking a wide shot of the wall. This makes it easy to pinpoint the location of the damage in the photograph.
Note Specifics: Instead of writing "scratch on floor," be specific: "12-inch-long, light scratch on hardwood floor next to the north-facing window." This level of detail removes ambiguity.
2. Doors and Windows Functionality Check
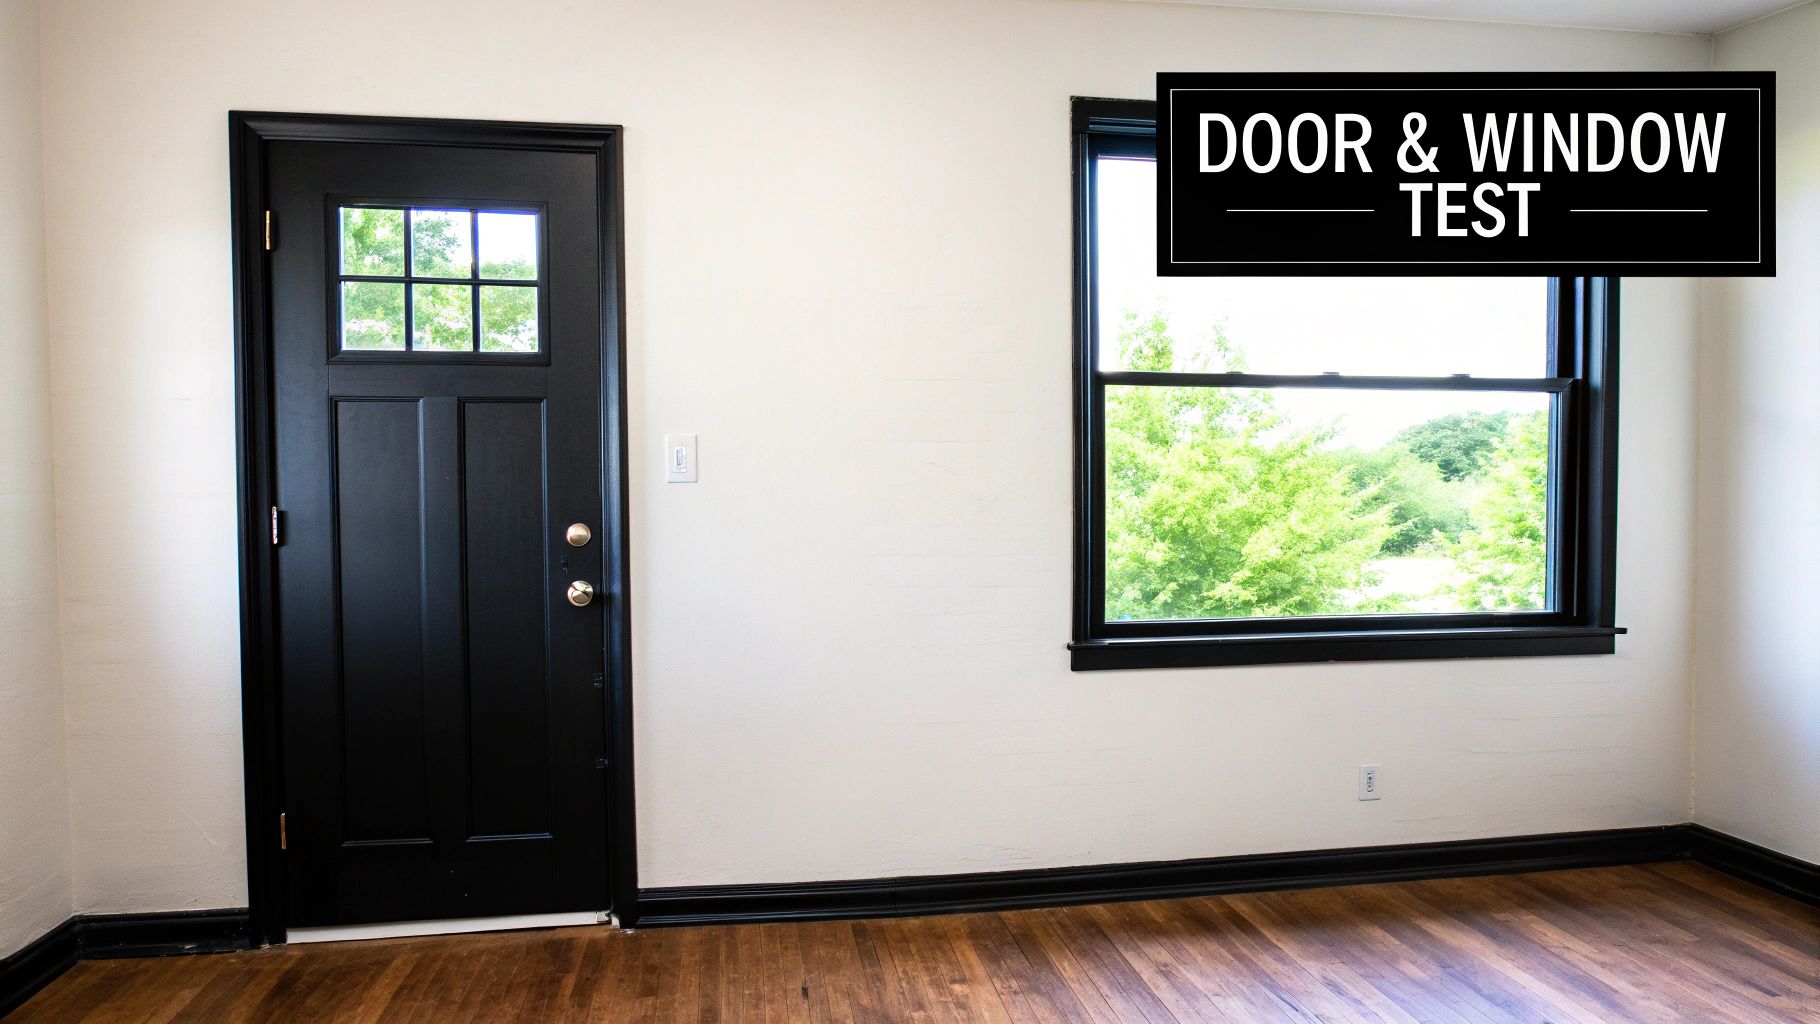
A thorough assessment of all doors and windows is a vital component of any move in property condition checklist, directly impacting security, energy efficiency, and daily convenience. This inspection involves systematically testing every door and window to ensure they open, close, and lock as intended. Documenting their operational status, from interior doors to exterior entry points and windows, establishes a clear record of functionality and condition, which is crucial for preventing future disputes over repairs or security deposit deductions.
This process protects all parties by confirming that the property is secure and weathertight at the start of the lease. For tenants, it guarantees peace of mind and prevents them from being held liable for pre-existing issues like a broken lock or a cracked window pane. For landlords, it provides a baseline to identify any tenant-caused damage, such as a damaged screen or a malfunctioning door handle, at the end of the tenancy.
Successful Implementation Examples
Commercial Property Management: Firms like Cushman & Wakefield utilize standardized checklists for commercial tenants, which include rigorous tests of every lock, window latch, and door closer to meet both security and fire code requirements.
Cold-Climate Real Estate: Real estate agents in regions with harsh winters make a point to specifically test window seals and weatherstripping before finalizing a lease. This proactive check helps avoid tenant complaints about drafts and high utility bills.
Student Housing Operations: To minimize maintenance requests and lockout calls, student housing operators meticulously document the functionality of every dorm room door and lock between academic years, ensuring they are in perfect working order for new students.
Actionable Tips for Door and Window Inspection
To conduct a comprehensive check, test each door and window individually. Don't assume that because one works, they all do. This methodical approach ensures no detail is overlooked, creating a robust and accurate report.
Test Locks Thoroughly: Operate every lock with the provided key from the outside and with the turn-bolt or latch from the inside. This confirms the entire mechanism is functional.
Check for Drafts: On a windy day, hold a lit incense stick or a thin piece of tissue paper near the edges of closed windows and doors. Any significant movement indicates a poor seal.
Verify Smooth Operation: Open and close each window and door completely at least twice. Note any sticking, squeaking, or if they scrape against the frame or floor.
Inspect All Hardware: Check that all window latches engage securely, screens are free of tears, and door handles or knobs are firmly attached.
Examine Glass and Seals: Look closely at each pane of glass for cracks, chips, or condensation between double panes, which signifies a broken seal.
3. Plumbing and Water Systems Assessment
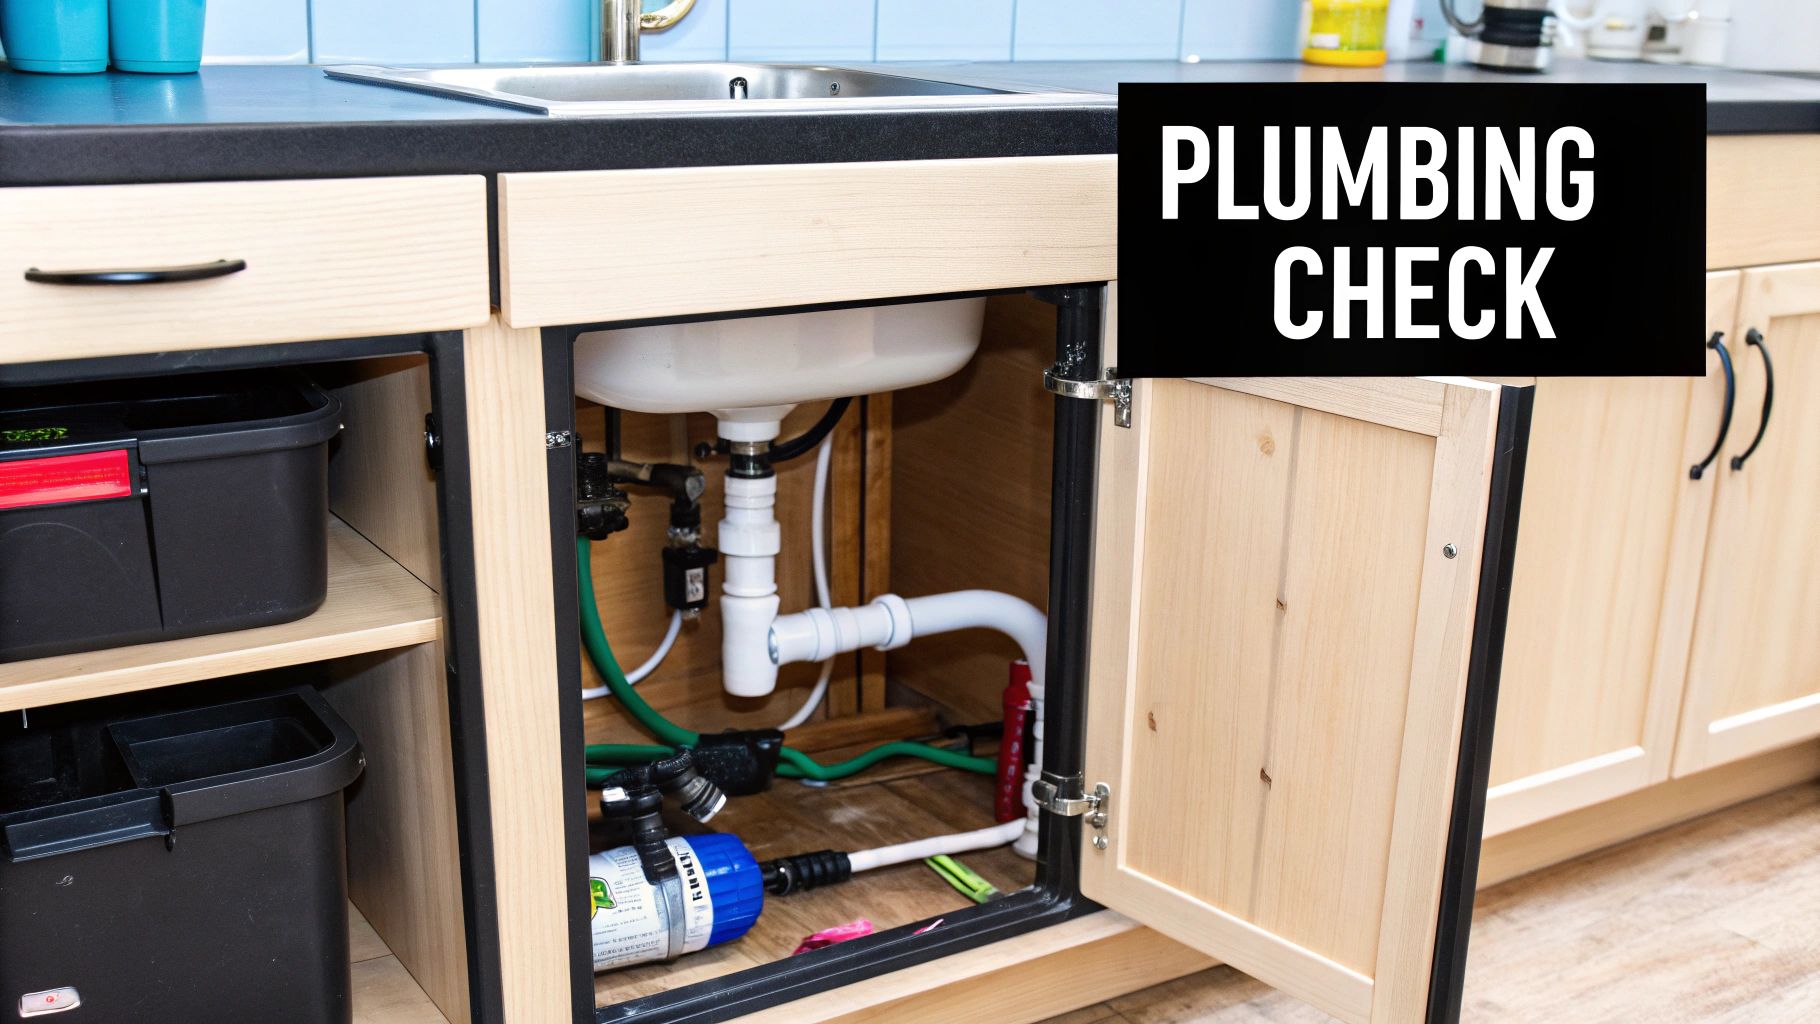
A thorough assessment of plumbing and water systems is a non-negotiable part of any move in property condition checklist. This involves a complete evaluation of all plumbing fixtures, water supply lines, and drainage throughout the property. By testing faucets, toilets, showers, and visible pipes, tenants and landlords can identify leaks, pressure problems, or drainage issues before they escalate. Documenting the functionality of these systems establishes a clear baseline, protecting tenants from being held responsible for pre-existing problems and helping landlords track the health of their property's infrastructure.
This proactive inspection prevents disputes over water damage or costly emergency repairs down the line. A leaking pipe or a poorly functioning water heater, if undocumented at move-in, can become a significant point of contention. This initial check ensures that all parties agree on the operational status of the plumbing from day one, which is vital for a smooth tenancy and fair security deposit reconciliation.
Successful Implementation Examples
Vacation Rental Management: Companies like Vacasa conduct detailed plumbing checks between each guest stay. Their housekeepers follow a strict protocol to test all faucets, toilets, and showers to ensure perfect functionality for the next arrival, preventing negative reviews and mid-stay maintenance calls.
Older Apartment Complexes: Property managers overseeing older buildings often use modern technology like thermal imaging cameras during move-in inspections. This allows them to detect hidden moisture behind walls or under floors, identifying slow leaks that are not yet visible to the naked eye.
Hard Water Regions: In areas known for hard water, diligent landlords specifically photograph and document any existing mineral buildup or calcification on showerheads and faucets. This written and visual evidence helps differentiate between pre-existing conditions and new deposits accumulated during the tenancy.
Actionable Tips for Plumbing Inspection
A systematic approach is key to an effective plumbing assessment. Test every water-related fixture and appliance in the home, from the kitchen to each bathroom. For additional insights, explore these rental property inspection tips to protect your investment.
Test Water Pressure: Run all faucets (kitchen and bathroom sinks, showers) simultaneously to check for a significant drop in overall water pressure, which could indicate a larger systemic issue.
Check Toilets Thoroughly: Flush every toilet and listen carefully as the tank refills. Note any continuous running sounds after it's full, which signals a faulty flapper or fill valve.
Verify Water Heater Function: Let the hot water run from a faucet for two to three minutes to confirm the water heater is working correctly and can deliver sustained hot water.
Use the Paper Towel Trick: To detect very slow, subtle leaks, place a dry paper towel on the cabinet floor under sink drain pipes (P-traps) while the water is running. Any dampness will be immediately obvious.
Look for Water Stains: In multi-story units, carefully inspect the ceiling directly below any upstairs bathrooms or laundry areas for discoloration or stains, which are tell-tale signs of past or current leaks.
Document Pipe Condition: Take clear, well-lit photos of the visible pipes under every sink. This provides a baseline of their condition, showing any existing corrosion or wear.
4. Electrical Systems and Fixtures Verification
Ensuring all electrical components are safe and fully operational is a non-negotiable part of a thorough move in property condition checklist. This verification involves systematically checking every electrical outlet, light switch, fixture, and the circuit breaker panel. Documenting the functionality of the entire electrical system not only confirms the property meets basic safety standards but also prevents future disputes regarding faulty wiring or non-working fixtures that were pre-existing.

This process is vital for both tenant safety and landlord liability. A comprehensive electrical check protects tenants from potential hazards like shocks or fires and provides landlords with a clear, documented record of the system's condition at the start of the lease. This baseline, underscored by standards from groups like the National Electrical Code (NEC) and the American Society of Home Inspectors (ASHI), is crucial for identifying any tenant-caused damage versus pre-existing issues.
Successful Implementation Examples
Corporate Housing Providers: Companies like Oakwood that cater to international or business travelers meticulously test and label all outlets. This ensures compatibility and safety for clients who may be using various electronic devices and adapters, making the electrical system a key part of their quality assurance.
Property Management Software: Platforms like Buildium integrate electrical checks into their digital move-in templates. These checklists allow managers to track the status of every outlet and switch on a room-by-room basis, creating an easily accessible and time-stamped digital record.
Insurance Underwriting: In certain regions, insurance companies may require documented electrical system inspections before issuing or renewing a landlord's policy. This practice mitigates their risk by confirming the property adheres to safety codes, making detailed move-in reports valuable for compliance.
Actionable Tips for Electrical Inspection
A methodical approach is key to an effective electrical inspection. Test every single component, moving systematically from room to room to avoid missing anything. This detailed record is an indispensable part of any complete move in property condition checklist.
Use an Outlet Tester: A simple, inexpensive three-light outlet tester can instantly identify common wiring problems such as open grounds or reverse polarity, providing a quick diagnostic for every outlet.
Test GFCI Functionality: For outlets in kitchens, bathrooms, and outdoor areas, press the "TEST" button on each Ground Fault Circuit Interrupter (GFCI) outlet to ensure it trips and cuts power correctly. Then press "RESET" to restore it.
Verify with a Device: Beyond a tester, plug a small device like a phone charger or night light into each outlet. This confirms that it not only has power but can sustain a load.
Document the Breaker Panel: Take a clear, well-lit photograph of the circuit breaker panel. Ensure all labels are legible, as this serves as a critical reference for both the tenant and maintenance personnel.
Check for Weatherproof Covers: Confirm that all exterior outlets are equipped with proper, intact weatherproof covers to prevent moisture intrusion and electrical hazards.
5. Appliances and Built-in Equipment Testing
Appliances and built-in equipment represent a significant portion of a rental's functionality and value. A thorough operational test of every appliance is a non-negotiable part of a move in property condition checklist. This involves systematically verifying that each piece of equipment, from the refrigerator to the HVAC system, is clean, safe, and fully operational at the start of the tenancy. Documenting the condition and function of these items prevents future disputes over repairs and responsibility.
This process establishes a clear record of appliance performance from day one, which is invaluable. For tenants, it ensures they are not held liable for pre-existing mechanical failures. For landlords, it confirms that all provided amenities are in working order, mitigating early maintenance requests and providing a baseline to assess any future damage or misuse.
Successful Implementation Examples
Luxury Apartment Communities: High-end complexes often provide tenants with a digital welcome packet that includes manuals, warranty information, and documented serial numbers for each appliance. This preemptively addresses operational questions and clarifies repair procedures.
Furnished Rental Companies: Providers like CORT, who specialize in temporary housing, have rigorous testing protocols. Their teams run full cycles on dishwashers and laundry units between every occupancy to guarantee reliability for incoming tenants.
Modern Property Management: Platforms like TurboTenant allow property managers to digitally log the make, model, and age of each appliance. This data helps track maintenance history and anticipate when an appliance might need replacement, aiding in capital expenditure planning.
Actionable Tips for Appliance Testing
To conduct a comprehensive test of all equipment, go beyond simply turning things on and off. A detailed operational check is necessary to uncover potential issues before they become major problems.
Run Full Cycles: Don't just turn on the dishwasher or washing machine. Run each through a complete cycle to check for leaks, proper drainage, and any unusual noises.
Test All Settings: Check every burner on the stove at different heat levels. Test the oven's bake, broil, and self-clean functions, if applicable.
Verify Temperatures: Place a thermometer inside the refrigerator and freezer to confirm they are holding a safe temperature. Run the HVAC system in both heating and cooling modes, regardless of the season, to ensure both functions work.
Record Specifics: Document the model and serial number of each appliance. Note any missing components like knobs, racks, or ice trays, and photograph them for the record.
6. Smoke Detectors, Carbon Monoxide Detectors, and Safety Equipment
Beyond the cosmetic condition of a property, a tenant's safety is paramount. This makes the inspection of smoke detectors, carbon monoxide (CO) detectors, and other safety equipment a non-negotiable part of any move in property condition checklist. This critical step involves verifying that all legally required safety devices are present, installed correctly, and fully functional. A failure in this area carries significant liability and safety risks for both landlords and tenants.
Documenting the operational status of these devices at move-in creates an official record of compliance with local and state safety codes. It confirms that the landlord has met their duty of care and transfers the responsibility for ongoing battery maintenance to the tenant, as often stipulated in lease agreements. This initial verification is crucial for protecting lives and mitigating legal and financial risks associated with fire or carbon monoxide incidents.
Successful Implementation Examples
Large-Scale Property Management: Companies like Lincoln Property Company maintain rigorous safety protocols, using digital systems to log the date and time of every detector test during unit turnover. This creates an auditable trail of compliance for their entire portfolio.
Insurance Industry Standards: Major insurance carriers such as State Farm often require landlords to provide proof of working smoke detectors and CO alarms to maintain liability coverage. This makes documented inspections a financial necessity.
University Housing: To ensure student safety across thousands of dorms, universities conduct monthly or quarterly alarm tests. These tests are documented, and residents are notified in advance, creating a culture of safety and awareness.
Actionable Tips for Safety Equipment Inspection
A systematic check of every safety device is essential. Test each unit individually and document its location and status. This process ensures nothing is overlooked and provides a clear reference for future inspections. For a deeper dive into the documentation process, you can explore these essential tips for a rental move-in move-out checklist.
Test and Document: Press and hold the "test" button on each smoke and CO detector for at least 5-10 seconds to confirm the alarm sounds properly. Record a short video of each successful test.
Check Expiration Dates: Most detectors have a lifespan of 8-10 years. Check the manufacture or replacement date printed on the back of each unit and plan for replacement if it's nearing expiration.
Replace Batteries: As a best practice, install fresh batteries in all detectors during the move-in inspection, even if the old ones appear to be working. This prevents early-tenancy issues.
Verify Locations: Ensure detectors are installed according to local codes, which often specify locations like inside each bedroom, outside sleeping areas, and on every level of the home. Note the exact location of each device on your checklist.
Inspect Fire Extinguishers: If a fire extinguisher is provided, check that its pressure gauge is in the green zone, it is easily accessible, and the safety pin is intact. Note its expiration date.
7. Heating, Ventilation, and Air Conditioning (HVAC) Systems
The operational state of a property's climate control systems is fundamental to tenant comfort, safety, and utility costs. A thorough inspection of the heating, ventilation, and air conditioning (HVAC) equipment is a non-negotiable part of a comprehensive move in property condition checklist. This involves verifying the functionality of furnaces, air conditioners, thermostats, and vents, as well as documenting their current maintenance status. A clear record of the HVAC system's performance at move-in prevents future disputes over repairs and ensures the tenant understands their responsibilities, such as filter changes.
This step provides crucial assurance for both parties. Tenants can confirm they are moving into a home with a functional and safe climate system, while landlords document that the equipment was in good working order at the start of the lease. This baseline is essential for assigning responsibility for any future malfunctions that may arise from neglect or misuse, distinguishing them from normal operational wear.
Successful Implementation Examples
Extreme Climate Property Management: In cities like Phoenix or Minneapolis, where HVAC performance is critical, property managers make this a priority move-in task. They often provide tenants with a signed verification form confirming the system was tested and met specific temperature outputs on the move-in date.
Large Multifamily Operators: Companies such as AvalonBay Communities often maintain detailed digital maintenance logs for each unit's HVAC system. During the move-in inspection, the leasing agent can pull up the service history, showing the last filter change and professional servicing date, which is then initialed by the tenant.
Smart Home Integration: Properties equipped with smart thermostats like Nest or ecobee now include their setup and functional status in the checklist. Landlords document that the device is reset to factory settings and fully operational, providing basic instructions for tenant use.
Actionable Tips for HVAC Inspection
A systematic test of the HVAC system is necessary to confirm its condition. Do not simply turn it on and off; allow the system sufficient time to cycle and demonstrate its full operational capacity.
Test Both Modes: Regardless of the season, test both the heating and cooling functions. Allow each mode to run for at least 15-20 minutes to ensure it can reach and maintain the target temperature.
Check and Document the Air Filter: Locate the air filter, photograph its condition (new or used), and note its size. This empowers the tenant to purchase the correct replacement, clarifying their maintenance responsibility.
Listen for Irregular Noises: Pay close attention to any unusual sounds coming from the indoor unit or outdoor condenser, such as grinding, squealing, or loud banging, which could indicate a mechanical issue.
Verify Airflow: Walk through the property and confirm that air is flowing from every vent. Note any rooms with weak or non-existent airflow, as this could signal a problem with the ductwork.
Document the Thermostat: Take a clear photo of the thermostat, note its model, and confirm all buttons and display features are working correctly. If possible, provide a link to the user manual.
Inspect the Outdoor Unit: Check the exterior condenser unit for any visible damage, debris, or obstructions that could impede airflow, like overgrown bushes or stored items.
8. Cabinets, Countertops, and Storage Areas Condition
Cabinets, countertops, and integrated storage areas are high-use components that significantly impact a property's functionality and aesthetic appeal. A detailed inspection of these elements is a crucial part of any move in property condition checklist. This involves a systematic review of all cabinetry, drawers, countertops, closets, and built-in shelving, primarily in kitchens, bathrooms, and utility areas, to document their state before occupancy begins.
This process is vital for distinguishing between normal wear from daily use and specific incidents of tenant-caused damage, such as heat marks on a countertop or a broken cabinet hinge. Establishing a clear, documented baseline of the condition of these surfaces and hardware is essential for a transparent security deposit reconciliation process, protecting both the landlord's investment and the tenant's funds.
Successful Implementation Examples
High-End Apartment Communities: In luxury rentals with expensive materials like granite or quartz, property managers photograph countertops from multiple angles with specific lighting to document any existing fissures, chips, or dull spots. This protects them from claims of pre-existing damage upon move-out.
Furnished Corporate Housing: Providers of furnished rentals conduct a dual-purpose inspection. They not only document the condition of shelves and drawers but also inventory the contents, creating a comprehensive record of both the storage unit's condition and the items within it.
Vacation Rental Management: To manage quick turnovers, vacation rental managers use detailed kitchen checklists. They document the condition of every cabinet door, shelf, and drawer, noting any scratches or sticky residues left by previous guests, ensuring the unit is perfect for the next arrival.
Actionable Tips for Cabinet and Countertop Inspection
A systematic approach ensures no detail is overlooked. In each room, open every single cabinet and drawer, and run your hand over every inch of countertop. Pay special attention to areas that experience the most use and potential damage, like the spaces under sinks and next to stoves.
Check Hardware and Functionality: Open and close every cabinet and drawer to ensure they operate smoothly. Test hinges, handles, and soft-close mechanisms, noting any loose, missing, or broken hardware.
Inspect Interiors Thoroughly: Use a flashlight to peer into the dark corners of cabinets and drawers. Look for stains, sticky residues, lingering odors, or signs of past pest activity.
Scrutinize Under-Sink Areas: The cabinet under every sink is a critical inspection point. Look for water stains, discoloration, warping, or a musty smell, which could indicate a slow, active, or past leak.
Document Surface Imperfections: For countertops, look for chips, cracks, scratches, stains, or heat damage. When photographing a chip, place a coin next to it to provide an immediate sense of scale in the image.
Verify Closet Integrity: In all closets, check that shelving is secure and not bowing. Confirm that clothing rods are firmly mounted to the wall and can support weight.
Move-In Property Condition Checklist Comparison
Inspection Type | Implementation Complexity 🔄 | Resource Requirements ⚡ | Expected Outcomes 📊 | Ideal Use Cases 💡 | Key Advantages ⭐ |
|---|---|---|---|---|---|
Walls, Ceilings, and Floors Inspection | Moderate – detailed visual & photographic | Time-intensive, requires camera and light | Accurate record of surface conditions pre-occupancy | Large properties, property management, short-term rentals | Prevents disputes; documents pre-existing damage |
Doors and Windows Functionality Check | Moderate – mechanical operation testing | Tools for lock testing; physical effort | Ensures security, safety, and energy efficiency | Security-sensitive properties; multi-unit buildings | Identifies security issues; energy loss prevention |
Plumbing and Water Systems Assessment | Moderate to High – functional & leak tests | Water usage, some specialized tools | Detects leaks, water pressure, and drainage problems | Older properties; vacation rentals; hard water regions | Prevents water damage; early repair identification |
Electrical Systems and Fixtures Verification | High – systematic, requires testers | Outlet testers; possible electrician support | Ensures electrical safety and functionality | Properties requiring code compliance; insurance needs | Identifies hazards; assures working fixtures |
Appliances and Built-in Equipment Testing | High – comprehensive operational tests | Utilities activation; time-consuming | Confirms appliance functionality and condition | Furnished rentals; luxury apartments; short-term rentals | Avoids disputes; baseline for maintenance |
Smoke Detectors, CO Detectors, and Safety Equipment | Moderate – device presence and function test | Batteries or hardwired; test kits | Legal compliance and tenant safety | All residential rentals; legally mandated inspections | Reduces liability; provides safety compliance |
Heating, Ventilation, and Air Conditioning (HVAC) | High – functional testing, seasonal limits | Time; possible seasonal limitations | Comfort assurance, energy efficiency evaluation | All climates; multifamily and commercial properties | Identifies inefficiencies; documents condition |
Cabinets, Countertops, and Storage Areas Condition | Moderate – detailed visual and functional | Time-consuming, inspection tools | Documentation of cosmetic and functional condition | Kitchens, bathrooms, furnished units | Protects deposits; identifies damage & maintenance |
Finalizing Your Inspection: The Key to a Secure Tenancy
You have now navigated the comprehensive, room-by-room process of completing a robust move-in property condition checklist. This isn't just about ticking boxes; it's about building a fortress of evidence, a clear and indisputable record that serves as the bedrock for a secure and transparent tenancy. By meticulously inspecting everything from the integrity of walls and floors to the functionality of complex HVAC systems, you have transformed a simple administrative task into a powerful tool for asset protection and conflict prevention.
The diligence you apply during this initial walkthrough directly correlates to the smoothness of the move-out process months or years down the line. Remember, the goal is to create a shared understanding between you and your tenant, backed by tangible proof. This detailed report, fortified with high-resolution photos and date-stamped videos, eliminates the ambiguity that so often leads to security deposit disputes. It sets a professional tone from day one, establishing clear expectations for property care and maintenance.
Key Takeaways for Lasting Impact
As you file away your completed inspection documents, let's distill the most critical takeaways from this guide. These principles are what elevate a standard checklist from a mere formality to a cornerstone of effective property management.
Documentation is Your Defense: Your memory will fade, but a signed document and a digital photo library will not. This evidence is your primary line of defense against claims of pre-existing damage. It protects your tenant from unfair charges and protects you, the owner, from bearing the cost of tenant-inflicted damages.
Systematic Approach Prevents Oversights: Moving from walls to windows, plumbing to electrical, and appliances to safety equipment in a structured manner ensures no detail is overlooked. A haphazard inspection is an incomplete inspection. The systematic approach detailed in this article guarantees comprehensive coverage.
Functionality is as Important as Aesthetics: A scratch on the floor is noticeable, but a non-functional HVAC unit or a leaky faucet is a far more significant liability. Testing every system, from the water pressure in the shower to the heating element in the oven, is non-negotiable. This protects you from immediate maintenance requests and ensures the property is truly "rent-ready."
Actionable Next Steps: Securing Your Documentation
Your inspection is complete, but the process isn't finished until the documentation is properly managed and secured. Taking these final steps ensures your hard work pays off when you need it most.
Secure Dual Signatures: Ensure both you (or your property manager) and the tenant sign and date every page of the completed move in property condition checklist. This formalizes the report as a mutually agreed-upon record.
Distribute Copies Immediately: Provide the tenant with a complete copy of the signed checklist for their records before you leave the property. This act of transparency builds trust and reinforces the collaborative nature of the agreement.
Create a Digital Archive: Scan the signed paper document and save it as a PDF. Store this file in a secure, cloud-based folder along with all the corresponding photos and videos from the inspection. Organize these digital assets in subfolders labeled by room (e.g., "Kitchen," "Master Bathroom") for easy retrieval.
Confirm Receipt in Writing: Send a follow-up email to your tenant confirming they have received their copy of the signed checklist. This creates an additional digital paper trail acknowledging the completion of this crucial step.
By embracing the detailed move in property condition checklist and following these final steps, you are not just managing a property; you are cultivating a professional, respectful, and legally sound tenancy. You are investing in peace of mind, mitigating future risks, and laying the groundwork for a positive landlord-tenant relationship that benefits everyone involved. This initial investment of time and attention is one of the single most valuable actions you can take to ensure a successful and profitable rental experience.
Feeling overwhelmed by the sheer detail required for a truly protective inspection? At Keshman Property Management, we handle this meticulous process for you, ensuring every aspect of your property is documented with expert precision. Let our team establish the clear, legally sound foundation your investment deserves by visiting Keshman Property Management to learn how we protect your assets from day one.


Comments