
Rental Move-In Checklist: Your Guide to Smooth Tenant Onboarding
- Sarah Porter

- Jan 2
- 16 min read
Updated: Jan 4
Handing over the keys is just the beginning. For savvy landlords and property managers, the tenant move-in process is the single most critical opportunity to set the stage for a successful, profitable, and dispute-free tenancy. A poorly executed move-in can lead to security deposit battles, unexpected repair bills, and a damaged landlord-tenant relationship from day one. A systematic, well-documented process, however, protects your investment, clarifies tenant responsibilities, and builds a foundation of professional trust.
This guide moves beyond generic advice to provide a comprehensive, 8-point rental move in checklist designed specifically to protect owner interests. We will break down each critical phase with actionable steps and practical tips to create a seamless onboarding experience. You will not find vague suggestions here, only a detailed framework for execution.
Inside this checklist, you will learn how to:
Conduct and document a meticulous property inspection with photographic evidence.
Properly manage utility transfers and meter readings to avoid billing disputes.
Verify essential safety equipment, from smoke detectors to window locks.
Communicate lease terms and property-specific policies effectively during tenant orientation.
By implementing this strategic rental move in checklist, you can mitigate future risks, streamline your management operations, and ensure your rental business operates with professional precision from the very first day of a new lease. This process is your first and best line of defense in asset protection.
1. Comprehensive Property Inspection & Photographic Documentation
The single most critical step in any rental move in checklist is conducting a meticulous property inspection, complete with extensive photographic and video evidence. This process establishes a definitive, time-stamped baseline of the property's condition before the tenant takes possession. It serves as irrefutable proof that protects both you and your tenant from future disputes over what constitutes pre-existing damage versus tenant-caused wear and tear.

This goes far beyond a simple walkthrough. A professional-grade inspection involves systematically documenting every room, fixture, and appliance. Modern property managers often use dedicated software like Zinspector or property management platforms with built-in inspection tools. These apps guide you through a digital checklist, prompt for photos of specific items, and automatically timestamp and organize the files, creating a professional, easily shareable report.
How to Implement a Robust Documentation Process
Your goal is to create a visual record so detailed that someone could virtually assess the property's condition just by reviewing the files. A comprehensive inspection report is your primary tool for justifying any withholdings from the security deposit. Understanding exactly what you can and cannot deduct is crucial for legal compliance. For a detailed breakdown, you can explore this guide on what landlords can legally deduct from a security deposit.
Actionable Tips for Flawless Documentation
Go Granular: Don't just photograph the room; photograph each wall, the ceiling, the flooring, and close-ups of any existing scuffs, scratches, or stains. Open every cabinet and appliance to document the interior condition.
Video Walkthroughs: Supplement photos with a narrated video walkthrough. As you record, call out the condition of items, demonstrate that appliances are working, and open and close windows and doors.
Systemize Your Files: Create a standardized file naming convention (e.g., ). Store all files securely in a cloud-based folder with at least one backup.
Tenant Acknowledgment: The process is only complete when the tenant signs the inspection report, acknowledging they agree with its assessment. Provide them with a copy for their records to ensure full transparency.
2. Utility Meter Reading Documentation & Transfer Verification
An often-overlooked but financially critical component of any rental move in checklist is the precise documentation of utility meter readings and the formal verification of account transfers. This step creates a clear financial cutoff, ensuring that the new tenant is billed only for their consumption from day one. It prevents disputes and protects the property owner from being held liable for utility bills that rightfully belong to the incoming resident.
Failing to document these readings can lead to significant financial ambiguity. Without a time-stamped starting point, it's nearly impossible to accurately prorate the first bill or prove when the financial responsibility shifted. Modern property management involves treating this not as a formality, but as a crucial risk-management task. The goal is to establish an undeniable record that confirms the tenant's responsibility and absolves the landlord of any utility charges incurred during the tenancy.
How to Implement a Robust Documentation Process
Your objective is to create a clear, auditable trail for every utility associated with the property. This process involves capturing the reading and ensuring the account's legal ownership is transferred. Many digital tenant platforms now incorporate this step into their onboarding workflow, requiring tenants to upload photos of the meter readings before they can finalize their move-in process. This puts the initial documentation onus on the tenant while providing you with the evidence you need.
Actionable Tips for Flawless Documentation
Photograph Everything: Take clear, well-lit photos of each utility meter (gas, electric, water) on the day of the move-in. Ensure the meter number and the reading are both clearly visible in the same shot.
Time-Stamp Your Evidence: Use a camera app that automatically adds a date and time stamp to the photo, or hold a smartphone with the current date and time visible next to the meter in the picture.
Create a Utility Addendum: Include a specific clause in your lease agreement or a separate addendum that outlines the tenant's responsibility for transferring utilities, including deadlines and the contact information for all relevant providers.
Systematic Follow-Up: Do not assume the tenant has completed the transfer. Set a calendar reminder to call the utility companies 5-7 business days after the move-in date to confirm the account has been successfully moved into the tenant's name.
Maintain a Master Log: For landlords managing multiple properties, a master spreadsheet or a feature within your property management software is essential. Track property addresses, meter numbers, move-in readings and dates, and move-out readings and dates to maintain a complete history.
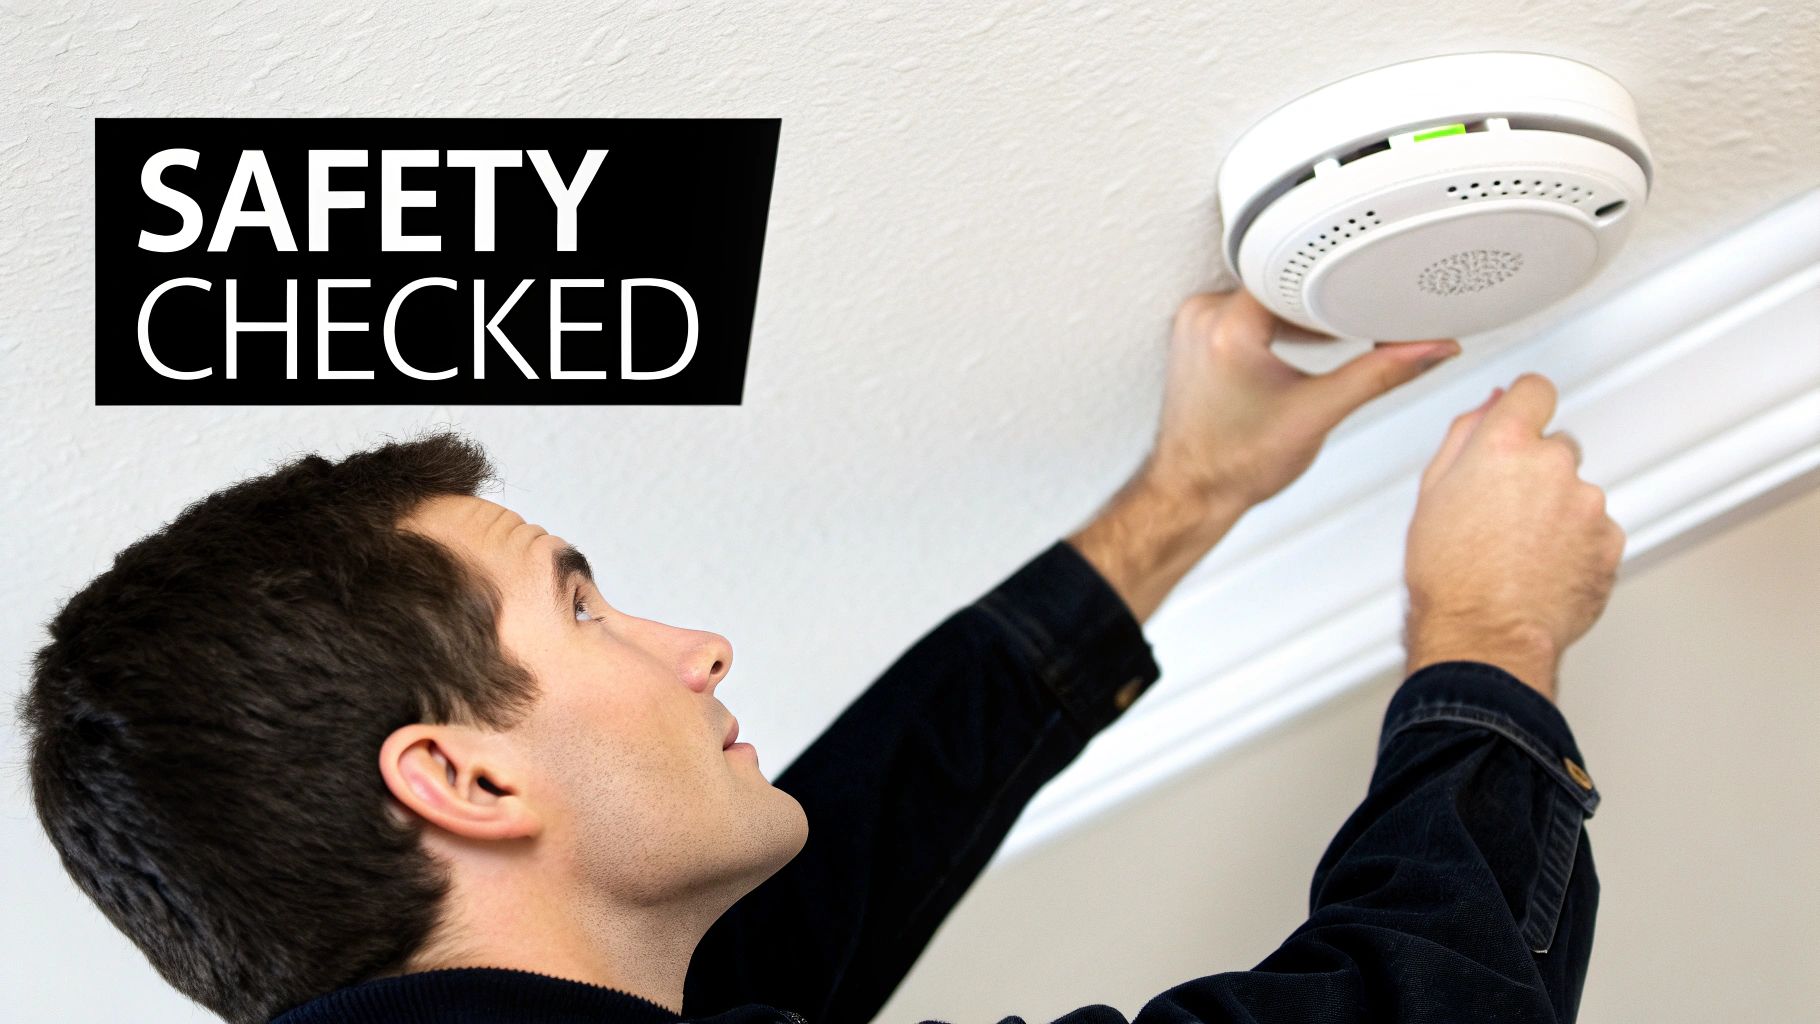
3. Smoke Detector, Carbon Monoxide Detector & Safety Equipment Testing
Ensuring all life-safety devices are fully operational is a non-negotiable part of any professional rental move in checklist. This step involves more than just a quick button press; it's a comprehensive verification that all smoke detectors, carbon monoxide (CO) detectors, and other required safety equipment like fire extinguishers are present, correctly installed, and within their service life. This process is a fundamental aspect of landlord liability protection and, most importantly, is critical for tenant safety.
Neglecting this duty creates significant legal exposure and puts lives at risk. Many jurisdictions have strict laws mandating the number, type, and placement of these devices. Modern property management often involves using hardwired, interconnected smoke alarms that activate simultaneously, and CO detectors with battery backups to ensure functionality during power outages. Some systems even integrate with property management software to send automated alerts for low batteries or device expiry dates, streamlining maintenance.
How to Implement a Comprehensive Safety Check
The goal is to create a documented, tenant-acknowledged record of safety compliance at the time of move in. This record should confirm that you have met all local and state safety codes and that the tenant understands their role in ongoing monitoring. Beyond initial testing, tenants should also be aware of crucial safety protocols, including understanding the immediate steps for emergencies, such as knowing exactly what to do if a carbon monoxide alarm goes off.
Actionable Tips for Flawless Safety Verification
Test and Document with the Tenant: Physically press the test button on every single smoke and CO detector in the presence of the new tenant. Have them sign a "Life Safety Device Acknowledgment" form confirming all alarms were operational on move-in day.
Check Expiration Dates: Most detectors have a lifespan of 7-10 years. Check the manufacturing date printed on the back of each unit and schedule replacements proactively. Photograph these dates for your records.
Verify Proper Placement: Ensure smoke detectors are installed inside each bedroom, outside each sleeping area, and on every level of the home. CO detectors should be on each level and near sleeping areas, per local code and manufacturer guidelines.
Create a Maintenance Schedule: Implement a recurring task in your calendar or property management system to replace all detector batteries annually. This simple step prevents late-night emergency calls for chirping alarms.
Provide a Fire Extinguisher: If required or provided, ensure the fire extinguisher is fully charged, accessible (e.g., under the kitchen sink), and that the tenant knows its location.
4. Appliance Condition Assessment & Operating Instructions Review
Beyond the walls and floors, appliances are a major component of a rental property's value and a common source of tenant maintenance requests. A thorough appliance assessment during the move-in process is a crucial step in a comprehensive rental move in checklist. This involves documenting the condition and functionality of every landlord-provided appliance and ensuring the tenant understands how to operate each one correctly. This preemptive measure minimizes future disputes over damage and reduces service calls caused by user error.

This process is more than just confirming an appliance turns on. It involves a joint operational test with the tenant present for every unit, from the refrigerator and dishwasher to the washer and dryer. Documenting serial numbers and existing cosmetic issues like scratches or dents establishes a clear baseline. Providing tenants with manuals and clear instructions empowers them to use the equipment properly, extending its lifespan and preventing costly repairs.
How to Implement a Robust Appliance Review
The goal is to create a transparent record of each appliance's state at move-in and equip the tenant for success. This prevents the "it was already broken" defense during a move-out inspection and avoids unnecessary maintenance calls for simple issues, like a tripped garbage disposal reset button. A clear record also provides essential information for warranty claims or future repairs.
Actionable Tips for Flawless Appliance Documentation
Perform Live Demonstrations: Run each appliance through a short, key cycle with the tenant. Start the dishwasher, turn on a stove burner, run the microwave, and start a rinse cycle on the washing machine to confirm functionality.
Photograph Key Details: For each appliance, take photos of the exterior, interior, brand, model, and serial number. This is invaluable for maintenance requests and asset tracking.
Provide Clear Instructions: Compile a folder, either physical or digital, containing the manufacturer's manuals for all appliances. For convenience, create and laminate quick-start guides for complex units.
Outline Tenant Responsibilities: Clearly communicate any routine maintenance the tenant is responsible for, such as cleaning the lint trap in the dryer, changing the refrigerator water filter, or regularly cleaning appliance surfaces. Document these responsibilities in the lease agreement.
5. Window & Door Locks, Keys & Access Control Documentation
A fundamental aspect of any rental move in checklist involves a rigorous verification of all security and access points. This means systematically testing every lock, documenting all keys provided, and ensuring a secure chain of custody for property access. This procedure is paramount for tenant safety, limiting your liability, and preventing future disputes over lost keys or malfunctioning locks. It establishes a clear record of security from day one.

This process extends beyond just the front door. It encompasses every potential entry point, including back doors, sliding doors, garage access, mailboxes, and all windows. Professional property managers often implement a strict policy of re-keying all exterior locks between tenancies as a non-negotiable security measure. This ensures previous tenants or anyone they gave a copy to can no longer access the property, providing peace of mind for both you and your new resident.
How to Implement a Robust Key Management Process
Your objective is to create an undeniable record of the property's secure state and the exact access materials provided to the tenant. This documentation should be signed by the tenant as part of the move-in packet, confirming receipt and understanding of their responsibilities. For apartment complexes and multi-unit rentals, property managers should also consider robust apartment building access control systems to manage security on a larger scale.
Actionable Tips for Flawless Access Control
Re-key Between Tenants: Always hire a professional locksmith to re-key all exterior locks after a tenant moves out. This is a critical investment in security and liability protection.
Create a Key Log: Document every key provided by code and function (e.g., F1 - Front Door, G1 - Garage, MB1 - Mailbox). Have the tenant sign this log to acknowledge receipt of the specific quantity of keys.
Test Every Lock: Physically test every single lock on the property, including windows, gates, and storage areas, in the tenant's presence if possible. Documenting that locks are in good working order is a key part of your landlord responsibilities, and you can get more information in this essential guide to landlord repair duties.
Lease Clause: Include a specific clause in the lease agreement that prohibits the tenant from changing or adding locks without your explicit written permission.
6. Plumbing System Testing & Water Pressure Documentation
A thorough plumbing system check is a non-negotiable part of any professional rental move in checklist. This step involves methodically testing every faucet, toilet, shower, and drain to confirm proper function, adequate water pressure, and the absence of leaks. Proactively identifying and documenting pre-existing plumbing issues protects you from costly emergency repairs and prevents disputes where a tenant might be blamed for a problem that existed upon their arrival.
This process is more than just turning on a tap. It's about creating a quantifiable baseline for the property's plumbing health. For example, using a simple water pressure gauge (available at any hardware store) to record the PSI at an outdoor spigot provides a concrete number for your move-in report. This objective data is invaluable if a tenant later claims a sudden drop in pressure, allowing you to determine if it's a new issue or consistent with the initial state.
How to Implement a Robust Plumbing Check
Your objective is to systematically verify and record the operational status of the entire plumbing system. This documentation acts as a preventative measure, catching minor drips before they become major water damage events and setting clear expectations with the tenant about the system's condition. A well-documented plumbing check demonstrates due diligence and can be crucial in distinguishing between normal wear and tear and tenant-induced damage.
Actionable Tips for Flawless Documentation
Stress Test the System: Turn on all faucets and showers simultaneously to check for significant drops in water pressure, which could indicate larger systemic issues.
Flush and Inspect: Run each toilet through several flush cycles, listening for constant running and checking for any leaks around the base or at the supply line connection.
Video Evidence is Key: Record a short video of each sink and tub draining. This provides time-stamped proof of drainage speed and helps identify pre-existing slow drains.
Check Hot Water: Time how long it takes for hot water to arrive at each faucet. Document this, as it manages tenant expectations and can signal a water heater issue.
Locate and Test Shut-Offs: The most critical part of this inspection is locating the main water shut-off valve and individual fixture shut-offs (under sinks, behind toilets). Show these to the tenant and confirm they are operable.
7. Flooring, Walls & Paint Condition Documentation
Beyond major appliances and fixtures, the surfaces of your property, specifically the floors and walls, are the most common areas for security deposit disputes. A detailed documentation process for flooring, walls, and paint condition is an essential part of any professional rental move in checklist. It creates a definitive baseline that clearly distinguishes between acceptable normal wear and tear and chargeable tenant-inflicted damage.
This level of documentation involves a systematic review of every surface in the unit. Experienced property managers will have a standardized process for this, often using a condition chart (e.g., "Excellent, Good, Fair, Poor") for paint and flooring in each room. This structured approach, combined with high-resolution, time-stamped photos, provides objective evidence that is hard to refute, protecting your investment and ensuring a fair move-out process.
How to Implement a Robust Surface Documentation Process
The objective is to capture the precise condition of every wall and floor surface before the tenant moves a single piece of furniture in. This detailed record is your primary evidence when assessing cleaning or repair costs at the end of a tenancy. For instance, knowing the exact location and size of a pre-existing carpet stain prevents you from incorrectly charging the outgoing tenant for it.
Actionable Tips for Flawless Surface Documentation
Systematic Photography: Photograph each wall from corner to corner and floors in sections, ensuring complete coverage. Capture high-traffic areas like entryways and hallways with extra care. Use natural light whenever possible for accurate color representation.
Use a Scale Reference: For existing scuffs, scratches, or carpet stains, place a common object like a coin or a small ruler next to the imperfection in your close-up shots. This provides an indisputable sense of scale.
Document Material and Condition: Note the type of flooring (e.g., "Low-pile Berber carpet, beige") and paint finish (e.g., "Eggshell finish, Sherwin-Williams Agreeable Gray"). Describe the condition in your report, noting any existing issues like faded paint, worn carpet pile, or minor scratches on hardwood.
Inspect Baseboards and Trim: Don't overlook the trim. Document the condition of baseboards, door frames, and window sills, as these areas often show signs of wear, scuffs from vacuums, or pet damage.
8. Lease Agreement Review, Tenant Orientation & Policy Communication
Handing over a signed lease is not the final step; it's the beginning of a crucial communication process. A thorough tenant orientation, where you verbally review the lease agreement and all pertinent property policies, is a non-negotiable part of a professional rental move in checklist. This meeting transforms a dense legal document into a practical guide for living in the property, setting clear expectations from day one and drastically reducing future misunderstandings.
This proactive communication ensures the tenant understands their responsibilities regarding rent payments, maintenance requests, and community rules. It also reinforces your role as a responsive and organized landlord. Professional property managers often use this as an opportunity to provide a comprehensive welcome packet, creating a positive start to the landlord-tenant relationship and clarifying all operational procedures before any issues can arise.
How to Implement a Robust Orientation Process
The goal is to bridge the gap between the legal text of the lease and the day-to-day realities of the tenancy. This involves more than just getting a signature; it’s about confirming genuine comprehension. This is your best opportunity to walk through maintenance procedures, explain what constitutes an emergency, and clarify rules on guests, parking, or property alterations. A well-executed orientation sets a professional tone for the entire lease term.
A solid lease is the foundation of this conversation. Ensuring your agreement is comprehensive and legally sound is paramount before you even sit down with the tenant. To ensure your documentation is up to par, consider reviewing a guide on what to include in a rental lease agreement template.
Actionable Tips for Flawless Communication
Schedule Dedicated Time: Conduct this meeting in a calm, unhurried environment. Rushing through the lease review can lead to missed details and future disputes.
Simplify Complex Clauses: Translate legal jargon into plain language. Explain the "why" behind specific rules, such as quiet hours or trash disposal procedures, to encourage compliance.
Walk Through Scenarios: Use practical examples. Explain exactly how to submit a non-emergency maintenance request (e.g., "log into the portal and describe the leaky faucet") versus an emergency one (e.g., "call this number immediately for a major flood").
Provide a Welcome Packet: Consolidate all key information into a physical or digital folder. Include emergency contacts, utility information, a copy of the lease, and a summary of key house rules for easy reference.
Use a Signed Acknowledgment: Have the tenant sign a simple checklist confirming you have reviewed specific key policies (e.g., rent payment, maintenance, pets, parking). File this with the lease as proof of the orientation.
8-Point Rental Move-In Checklist Comparison
Task | 🔄 Implementation Complexity | ⚡ Resources & Time | ⭐ Expected Outcomes | 💡 Ideal Use Cases | 📊 Key Advantages |
|---|---|---|---|---|---|
Comprehensive Property Inspection & Photographic Documentation | High — systematic room-by-room workflows 🔄 | Moderate–High — camera/video, cloud storage, several hours ⚡ | Strong evidentiary baseline for disputes ⭐ | Move-in/move-out for high-value or contested units 💡 | Reduces disputes; streamlines inspections; legal evidence 📊 |
Utility Meter Reading Documentation & Transfer Verification | Medium — coordination with multiple providers 🔄 | Low–Moderate — photos, calls, admin time ⚡ | Clear utility responsibility; prevents landlord billing liability ⭐ | Units billed separately or high-turnover moves 💡 | Avoids past-due charges; detects unusual consumption 📊 |
Smoke Detector, Carbon Monoxide & Safety Equipment Testing | Low–Medium — follow regulatory checklists 🔄 | Low — test button, batteries, periodic checks ⚡ | High safety/compliance; liability reduction ⭐ | Legal compliance checks; insurance inspections 💡 | Ensures code compliance; protects tenants; may reduce premiums 📊 |
Appliance Condition Assessment & Operating Instructions Review | Medium — test cycles and serial documentation 🔄 | Moderate — run appliances, collect manuals, photos ⚡ | Clear baseline for appliance condition and use ⭐ | Units with many appliances; warranty management 💡 | Prevents false claims; educates tenants; extends appliance life 📊 |
Window & Door Locks, Keys & Access Control Documentation | Medium — key inventories, possible re-keying 🔄 | Moderate — locksmith, key logs or smart lock setup ⚡ | Improved security and access accountability ⭐ | New tenants, shared units, high-turnover properties 💡 | Enhances security; documents access; reduces liability claims 📊 |
Plumbing System Testing & Water Pressure Documentation | Medium–High — technical tests and leak detection 🔄 | Moderate–High — gauges, plumber if needed, time ⚡ | Early leak detection and baseline for claims ⭐ | Older properties or signs of plumbing issues 💡 | Prevents water damage; documents pre-existing problems 📊 |
Flooring, Walls & Paint Condition Documentation | Medium — detailed photos and measurements 🔄 | Moderate — close-ups, notes, possible professional photos ⚡ | Clear baseline distinguishing wear vs damage ⭐ | Units with varied/older finishes or disputed deposits 💡 | Protects security deposits; identifies cleaning/repairs needed 📊 |
Lease Agreement Review, Tenant Orientation & Policy Communication | Low–Medium — walkthrough and acknowledgments 🔄 | Low–Moderate — orientation session, translated materials ⚡ | Fewer misunderstandings; better tenant compliance ⭐ | First-time tenants, multi-language contexts, complex rules 💡 | Reduces disputes; documents informed consent; improves compliance 📊 |
Transforming Your Checklist into a Cornerstone of Proactive Management
As we have detailed, a comprehensive rental move in checklist is far more than a simple to-do list; it is the foundational document of a successful tenancy. By moving beyond a cursory walkthrough and embracing a meticulous, system-driven process, you transition from a reactive landlord to a proactive property manager. This strategic shift is what separates profitable, low-stress investments from a constant cycle of disputes and unexpected expenses.
We've covered the critical checkpoints, from photographic documentation of every surface to the verification of utility transfers and the systematic testing of safety equipment. Each item on this checklist, whether it’s documenting a pre-existing scuff on the baseboard or confirming the tenant has a full set of keys and understands the emergency shut-off valve, serves a dual purpose. It protects your physical asset and it establishes a professional, transparent relationship from the very first day.
From Administrative Task to Strategic Asset
Think of your completed rental move in checklist as an insurance policy against ambiguity. When a tenant moves out, the detailed report you created together becomes the definitive source of truth. It removes emotion and subjectivity from the security deposit reconciliation process, turning potential conflicts into straightforward, fact-based conversations.
This documentation accomplishes several key objectives:
Mitigates Legal Risk: It provides clear, timestamped evidence of the property's condition, which is invaluable in the event of a security deposit dispute.
Sets Clear Expectations: When tenants participate in a thorough inspection, they acknowledge the property's condition and understand their responsibility to maintain it.
Enhances Tenant Relations: A professional, detailed onboarding process demonstrates your commitment to good management and fair practices, fostering respect and cooperation.
Key Insight: The initial hours you invest in executing a flawless move-in inspection will save you dozens of hours in potential future conflicts, repairs, and legal headaches. It is one of the highest-return activities a landlord can perform.
Actionable Next Steps: Implementing Your System
Merely having a checklist is not enough; consistent and disciplined execution is what unlocks its value. Your immediate next step is to formalize your own process. Use the templates and guidelines discussed in this article to create a standardized rental move in checklist for your portfolio. Digitize your records, organize your photos by room, and ensure every file is securely backed up.
Your goal is to build a repeatable system that you or a team member can execute flawlessly for every new tenancy. This systemization removes guesswork, ensures no detail is overlooked, and solidifies your role as a professional operator. The move-in day is your first, and best, opportunity to demonstrate competence and set the stage for a smooth, mutually beneficial landlord-tenant relationship. By mastering this crucial phase, you are not just handing over keys; you are laying the groundwork for a protected investment and a predictable, profitable rental business.
Executing a move-in process with this level of detail requires time, expertise, and unwavering consistency. If you want to ensure your investment is protected by a proven, professional system without managing the day-to-day logistics, consider partnering with an expert. Keshman Property Management specializes in implementing rigorous, tenant-focused processes like the comprehensive rental move in checklist to protect owner interests and maximize asset performance.


Comments